Print Templates
The Print Template feature in Frappe Books allows you to create personalized print templates for Invoices and a few other Entries.
To view and create Print Templates navigate to its page using the sidebar: Setup > Print Templates. Or alternatively open the Quick Search, type "Print Template" and hit enter.
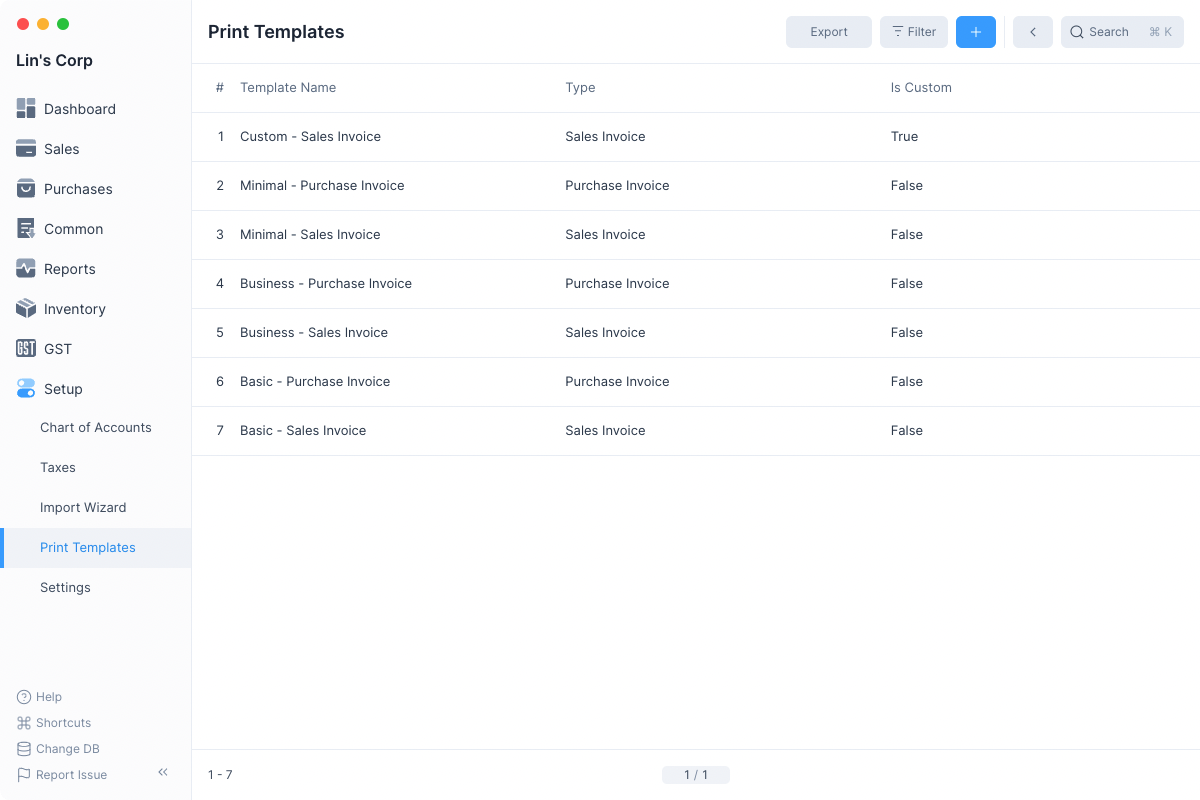
Preloaded Templates
When you create a new instance of Frappe Books, it comes preloaded with a few templates.
You use these as they are, or you can Duplicate and customize them.
If you would like to familiarize yourself with the Template Builder interface before learning how to create a Print Template, click here.
Creating a Print Template
To create a Print Template, first navigate to the Print Template list and click on the blue + button.
You will now see the Template Builder tool.
You can enable the Edit Mode by clicking the edit button next to the Save as PDF button.
Next, select the template type. Sales Invoice is selected by default, but you can create Print Templates for other entry types too.
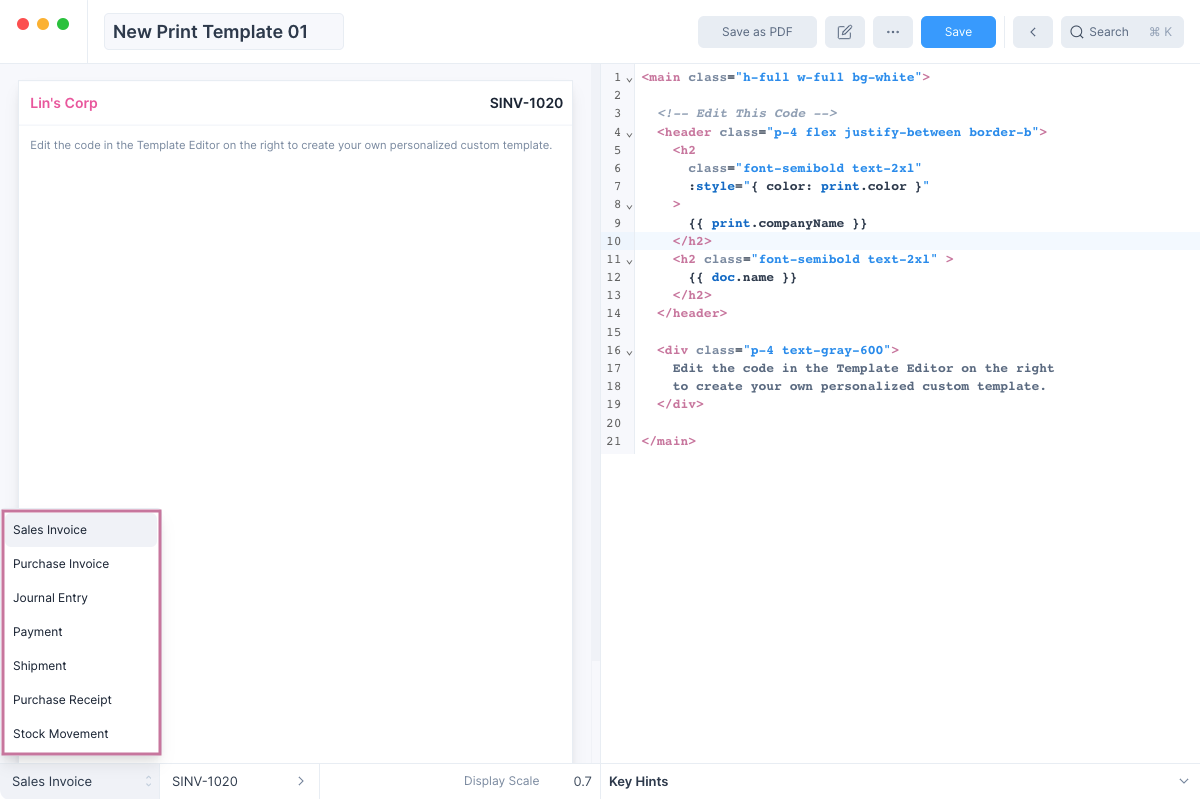
Display Entry
You can change the example Entry being displayed. By default Frappe Books selects the latest entry that has been created.
Custom Sizes
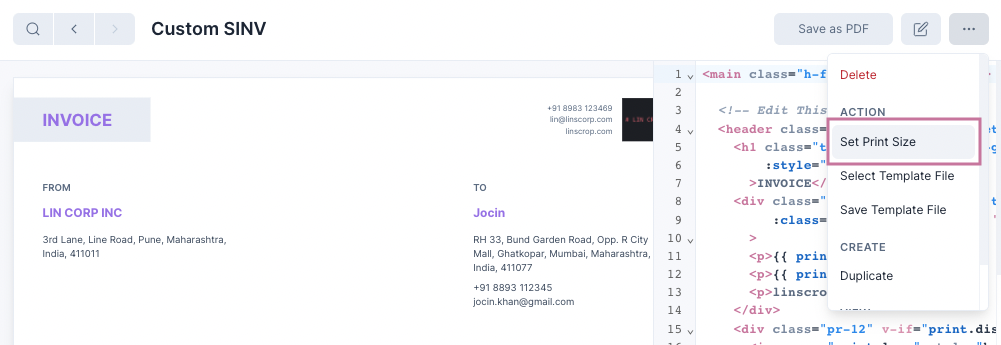
You can adjust the size of the Print Template by clicking on the Set Print Size option in the ··· menu.
Now you are ready to edit the Print Template
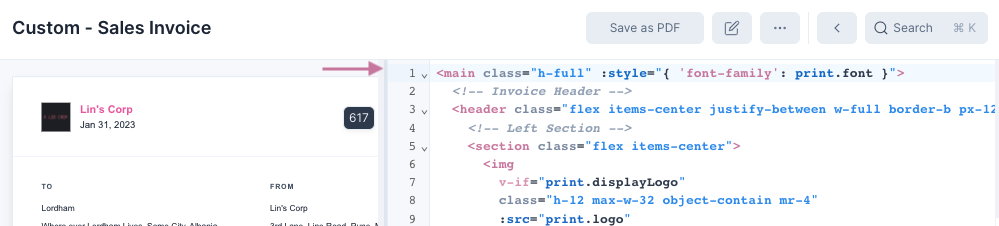
Editing the Template
The left pane contains the Template Editor which is used to edit the template. You can remove the preset template and write the template that you want here.
Template Syntax
The templates follow the Vue.js template syntax. You can learn more about it here.
Resizing the Template Editor
You can resize the Template Editor by clicking on the border and dragging it.
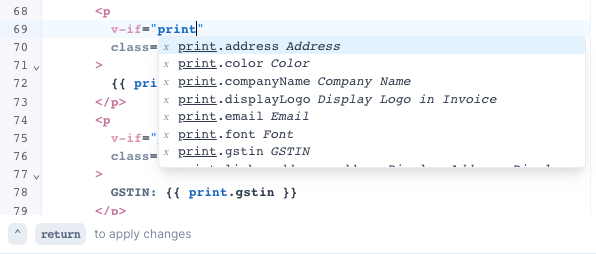
Displaying Values
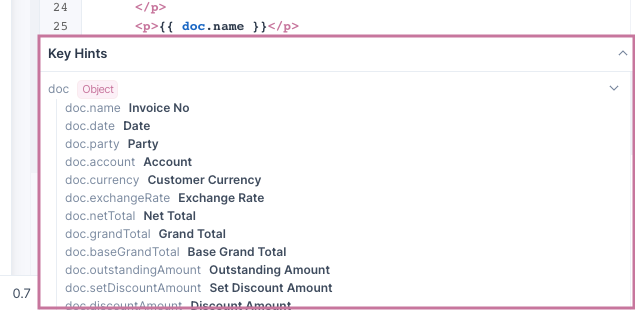
Values can be displayed by mentioning their keys inside curly braces. For example:
<h1>{{ doc.name }}</h1>
Here doc.name is the key for Invoice No and it will be displayed in an h1 element.
The Template Editor can help you by autocompleting the keys as you type the name.
There are two sets of keys to display values:
doc: these keys are used to display values from the entry such as Invoice No, Account, Date, etc. These keys vary depending on the Entry Type.print: these keys are used to read Print Settings values such as Logo, Email, Color, etc.
Key Hints
If you want to see the available values you can click on the Key Hints section below the Template Editor.
Template Styling
You can either use inline CSS styles or utility classes from tailwindcss to style the different components of your templates.
Applying Changes
To apply the changes made in the editor, you can:
- Click outside the template editor
- Press the shortcut keys (
⌃ returnfor macOS andCtrl Enterfor other operating systems).
Using the Template
After you have edited your template and clicked on the blue Save button to save the changes you have made. You can use the templates save your entries as PDFs which you can send to your customers.
To use the template, navigate to the entry and click on the Print button.
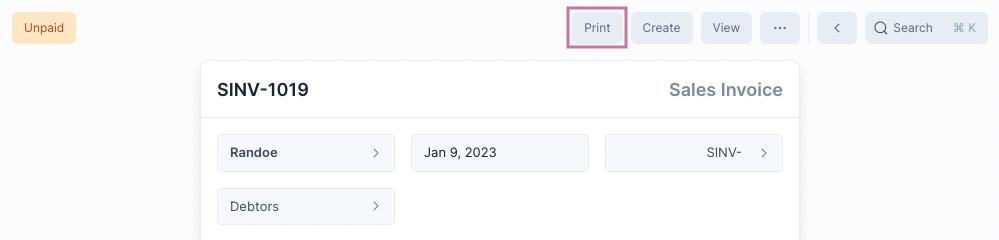
You will now see the print preview. You can change the template to be used from the list on the left.
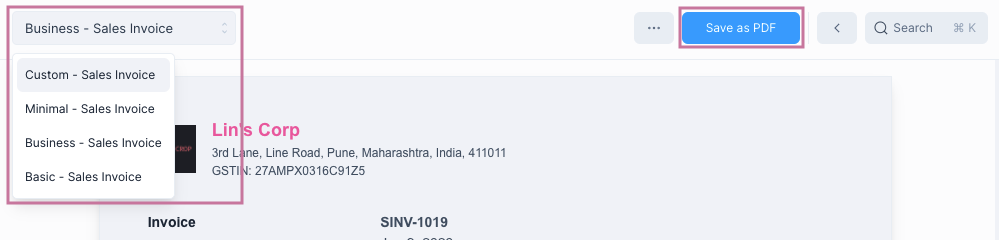
Once you are satisfied with your selection click on the blue Save as PDF button to save it.
Template Builder Interface
When you open any of the Print Templates or when you click on the blue + button to create a new Template, you will be shown the Template Builder tool.
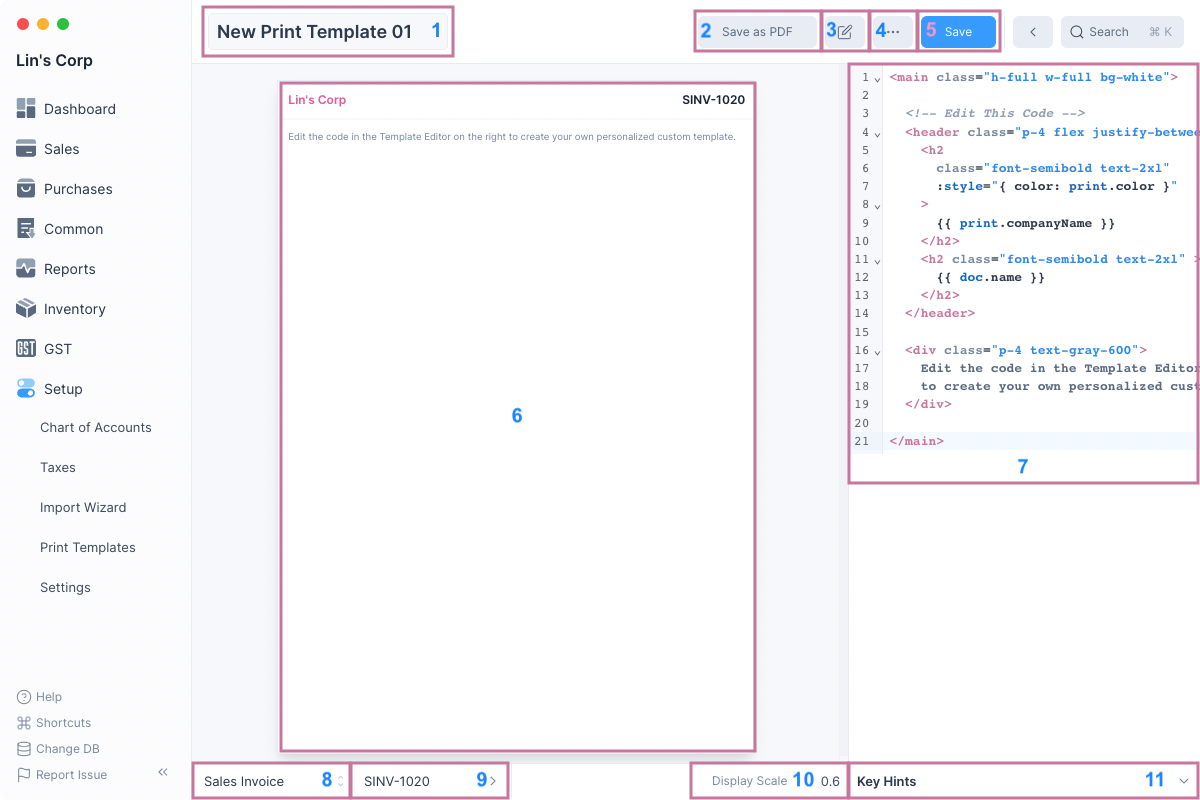
Here's a list of what each component does:
- Template Name: text input to edit the Print Template name if it has not been saved.
- Save as PDF: button to save the selected entry as a PDF file.
- Toggle Edit Mode: button to toggle edit mode.
- More: dropdown menu with options such as view the print settings, and selecting and saving the template file.
- Save: button to save the Print Template after editing its values.
- Template Preview: preview template after editing without saving it.
- Template Editor: text input to edit the template.
- Template Type: drop selector to set the template type.
- Display Entry: entry to show in the preview area.
- Display Scale: number input to change the Template Preview scale.
- Key Hints: component that shows the available keys (such as
doc.name,doc.date, etc) that can be used in the template.
Tips for Creating Templates
Here are a few tips to help you create custom print templates.
Duplicating preloaded templates
If you are not familiar with HTML, CSS and Vue.js Template Syntax then you might find creating a custom template to be a bit challenging.
If this is the case, we suggest duplicating one of the Preloaded Templates and editing the duplicate.
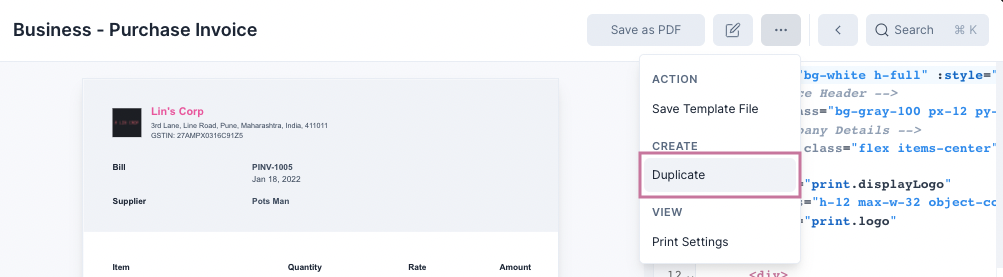
This way you can make and apply small changes and see how it affects the Preview and step by step make the template like how you want it to look.
Precaution when using tailwindcss
A few of the tailwindcss defaults (for example colors) used in Frappe Books have been overriden using the tsconfig.js file.
Since these values are subject to change we suggest not relying on the overriden tailwindcss styles. Not doing this may cause your templates to change when we update the defaults.