Customize Form
Frappe Books allows you to customize all forms whether it's Invoice, or Party, or Item you can use the Customize Form feature to add additional fields to it.
Enable Form Customization
To be able to customize a form you need to enable it from the General Settings.
Setup > Settings > General
After you have navigated to the General Settings tab, click on the Enable Form Customization checkbox.
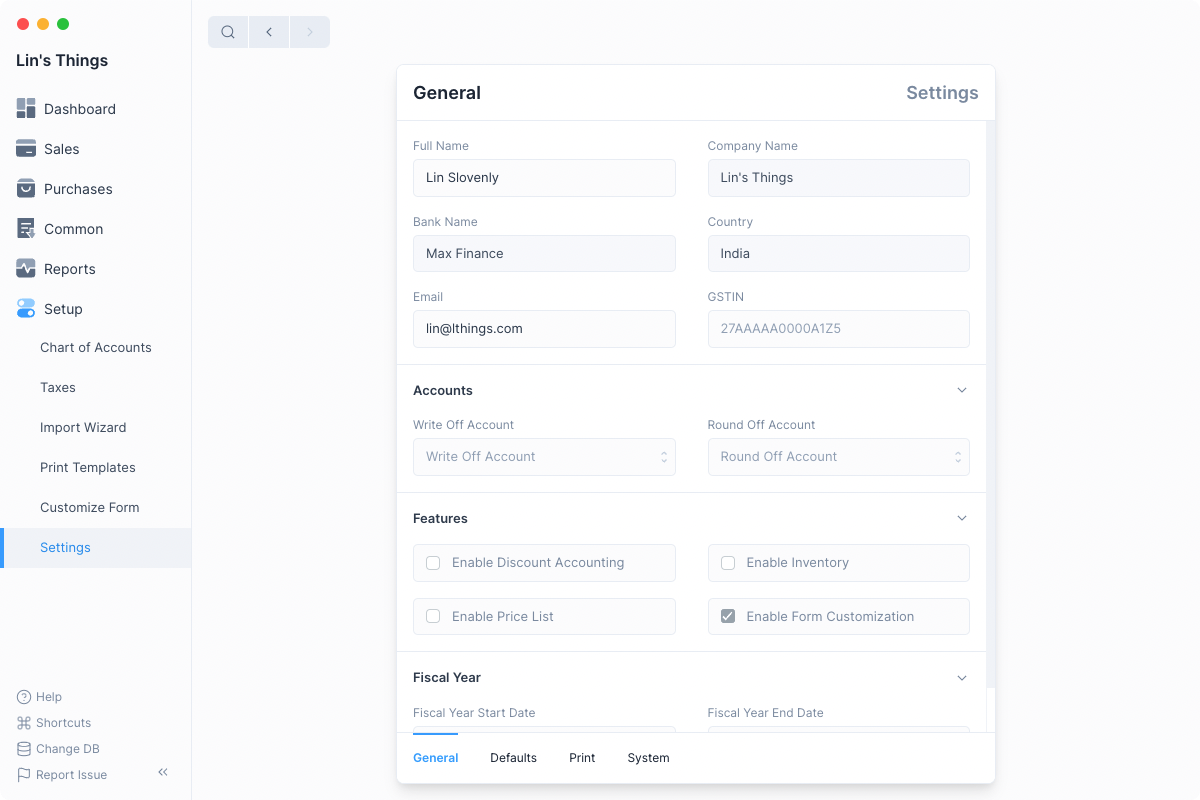
You will have to reload Frappe Books to see the option, you can press Ctrl + R if you are on Windows or linux, or command + R on macOS.
Disabling Form Customization
Disabling Form Customization will just hide the form customization option from the sidebar and search, it will not disable the customizations.
Customizing Forms
After enabling form customization and reloading Frappe Books navigate to the Customize Form list view using the sidebar.
Setup > Customize Form
After that click on the blue + button to customize a form type. This will open a new Custom Form entry.
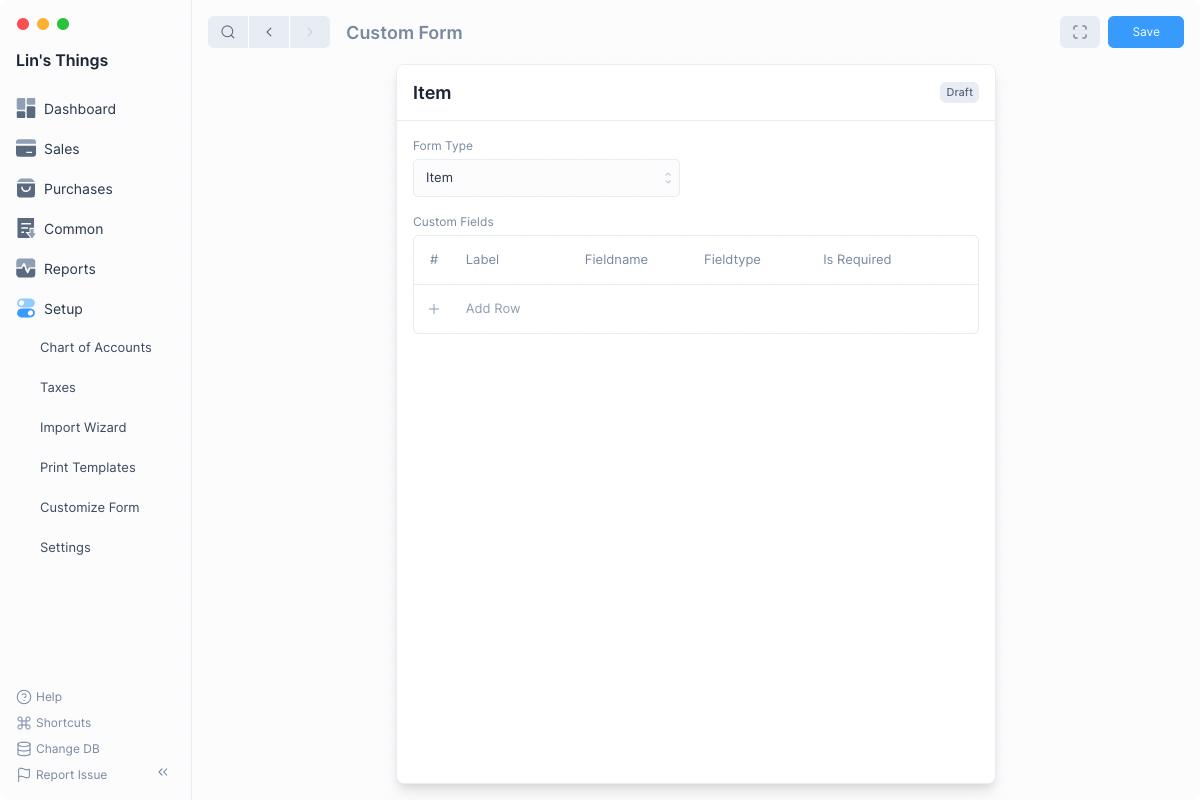
Select a Form Type to customize.
Form Type
Form Type refers to the form that you want to add fields to such as Item, Party, Sales Invoice, etc.
Each Form Type can have only one Custom Form entry associated with it.
Once you select the Form Type you can add Custom Fields
Custom Fields
Each Form Type can have multiple custom fields. Click on the Add Row button to add a new Custom Field.
Enter its Label, for example if we want to add a color field to Item, we will set the Label as "Color".
Fieldname
Setting the Label will auto set the Fieldname value. The Fieldname is a name used to refer to the field internally.
After setting the Label and the Fieldname, you can select the fieldtype, for more information on fieldtype and the other fields that you can set for each Custom Field row check the sections below.

Once you are done click on the blue Save button.
Reload App
After customizing a form you must reload Frappe Books to view the added fields in the forms.
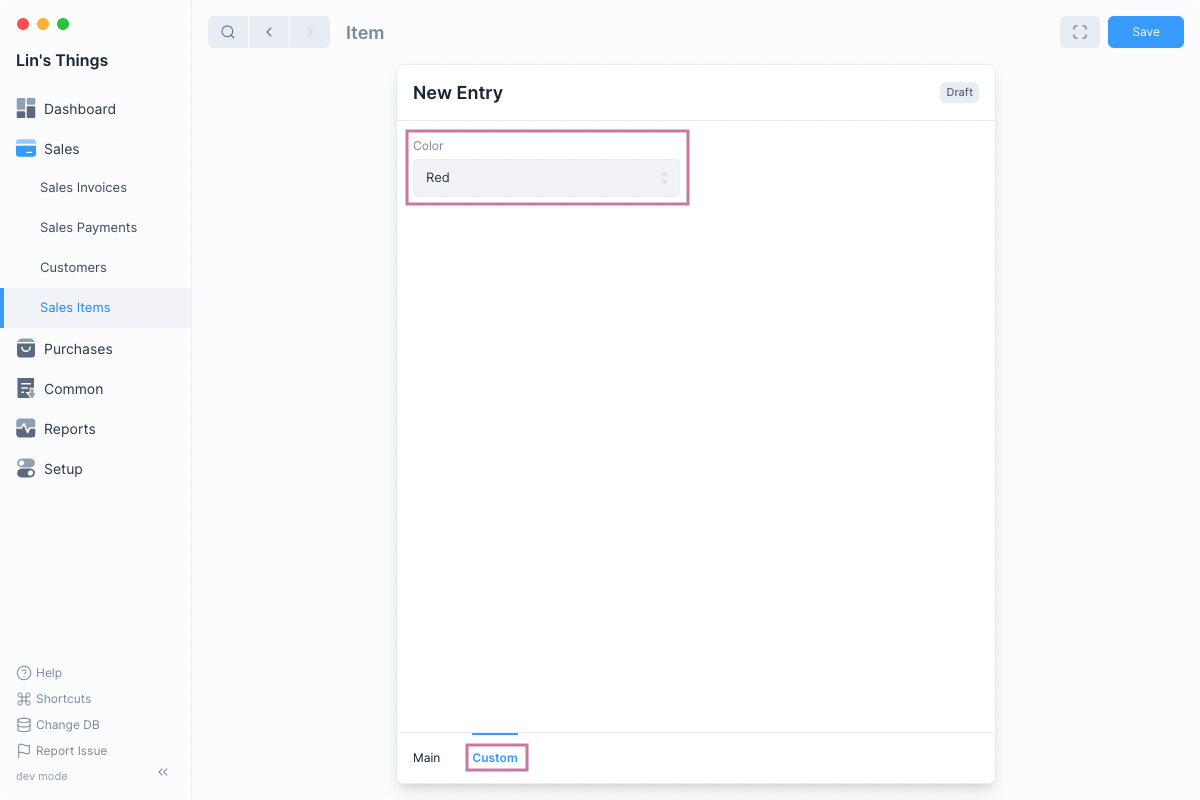
After reloading the app, you will see the new fields in the form.
Custom Field Fieldtypes
Custom Forms support 16 different Fieldtypes, each field type defines the behavior and UI of the field.
For some fields you will have to enter additional details, here's a table the describes the different Fieldtypes.
| Fieldtype | Description | Example | Additional |
|---|---|---|---|
| Data | Field used for regular text input. | Full Name in Customer | - |
| Text | Field with larger area of input for longer text. | Notes in Sales Invoice | - |
| Date | Field used to input only date. | Date in Sales Invoice | - |
| Date Time | Field used to input date and time. | Date in Stock Movement | - |
| Int | Field used to input integer such as -1, 0, 3, etc. | HSN/SAC Code in Item | - |
| Float | Field used to input fractional numbers such as 0.12, -9.33, 100.1, etc. | Quantity in Sales Invoice Item | - |
| Currency | Field used to input monetary amounts. | Amount in Sales Invoice Item | - |
| Check | Field used to display a checkbox. | Track Item in Item | - |
| Select | Field used to select an item from multiple choices. Requires Options value to be set | Entry Type in Journal Entry | Options |
| Autocomplete | Same as Select but with autocomplete. Used for larger number of options. | Country in Address | Options |
| Color | Field used to select a color. Can set options to select color from. | Color in Print Settings | Options |
| Link | Field used to mention links to other entries. Requires Target to be set. | Customer in Sales Invoice | Target |
| Dynamic Link | Field used to mention links depending on a dynamic target. Requires References to be set. | Name in Payment Reference | References |
| Attach Image | Field used to select an image. | Image in Item | - |
| Attachment | Field used to select any type of file. | Add Attachment in Sales Invoice | - |
| Table | Field used to display a Table. This is currently not supported. | Items in Sales Invoice | Target |
Other Custom Form Fields
Fields that describe behaviour:
- Is Required: Whether this field is required for a form to be saved.
- Options: New line separated list of options required by Select and Autocomplete and used by Color.
- Target: Form type from which Link field value is selected. If Table then the name of the Table form type.
- References: Fieldname of the reference field which sets the Dynamic Link target type. Eg Type in Payment Reference.
Fields that describe UI:
- Form Tab: Tab on the form under which the field is displayed.
- Form Section: Section under the entered tab where the field is displayed.
Deleting Customizations
You can delete a forms customizations by deleting its Custom Form entry:
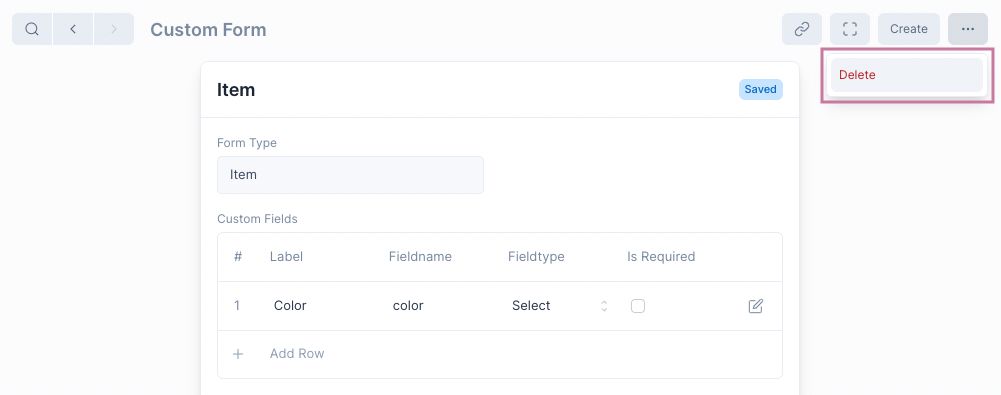
Data Loss
Deleting customizations will also delete data that had been stored in the custom fields.